Installing wood veneer wall paneling in 2026 is more than attaching decorative sheets to a wall. It requires careful measuring, suitable adhesives, and a stable surface. This guide explains how to create durable Wood Veneer Paneling Walls with practical methods used by experienced installers.
Before cutting anything, inspect the wall for moisture, loose paint, uneven areas, and hidden electrical cables. A straightedge, level, fine-tooth saw, adhesive, spacers, and a sharp utility knife are useful tools. Real wood veneer can react to temperature and humidity, so allow the panels to acclimate indoors. Usually, forty-eight hours helps, but the manufacturer’s instructions should control the process.
Small errors become visible quickly. A slightly uneven first panel may affect the entire installation. Mark the layout from the room’s most noticeable wall, not automatically from the corner. Leave a narrow expansion gap where recommended, then cover it with trim. Apply adhesive in controlled beads, press each panel firmly, and check alignment after every installation. Avoid rushing. I once underestimated how strongly uneven plaster could affect panel joints, and that mistake required extra sanding and adjustment. It was a useful reminder that preparation often matters more than speed.
The following sections cover wall preparation, panel cutting, adhesive selection, corner treatment, and finishing details. They also address common problems, including open seams, visible grain mismatches, and panels lifting from damp surfaces. With accurate planning and realistic expectations, the finished wall can provide warmth, texture, and a professional appearance without unnecessary waste.
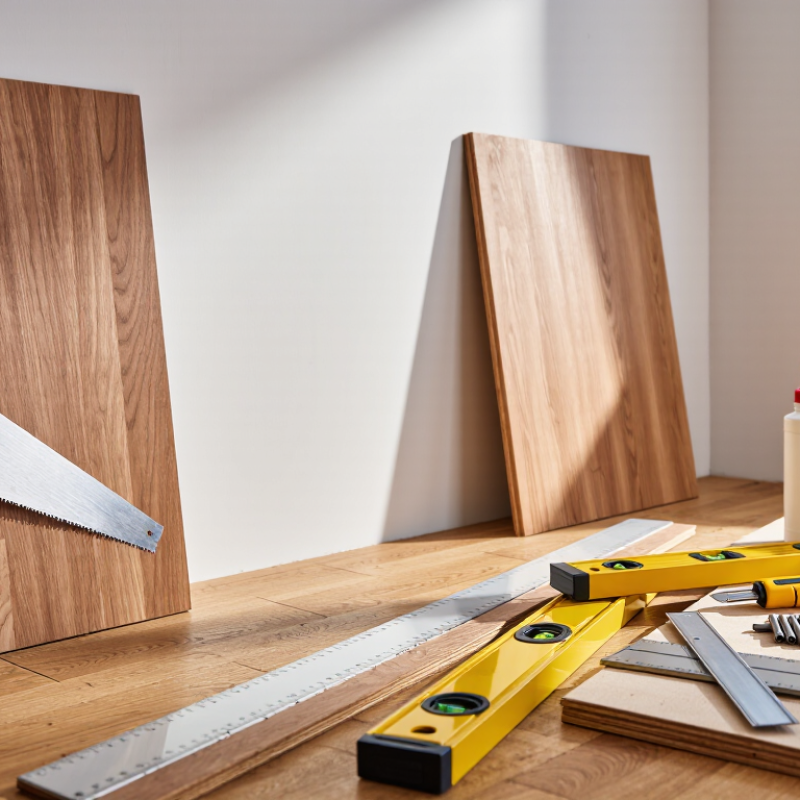
Choosing the right wood veneer panels determines whether a wall looks refined or gradually develops gaps. Start with the room’s moisture conditions, not the color sample. The USDA Forest Products Laboratory’s Wood Handbook reports typical tangential shrinkage of about 6–12% from green wood to oven-dry wood. Veneer is already dried, but seasonal movement still matters. In a humid hallway, select panels with a stable core and inspect every sheet for bowing, open joints, or loose veneer.
Measure the wall twice. A flat substrate, moisture meter, fine-tooth saw, construction adhesive, and corrosion-resistant finishing nails are essential. Follow the panel manufacturer’s required adhesive coverage and leave movement gaps at corners, ceilings, and floors. I usually place thin spacers behind the first row, because a small error there can follow the entire wall. It is not glamorous work.
The U.S. Environmental Protection Agency reports that indoor relative humidity above 60% can encourage biological growth, so control room humidity before installation. Keep panels indoors for acclimation, commonly for 48–72 hours when instructions permit. Avoid assuming every adhesive suits every backing material; compatibility tests on an offcut are safer. The mistake I still see most often is choosing a beautiful veneer first and checking the wall conditions later. That order deserves reconsideration.
Before installing wood veneer wall paneling in 2026, inspect the wall carefully. Remove dust, loose paint, grease, and old adhesive. If the wall looks flat, it may still contain shallow dips. Use a long level to check it. A practical target is no more than 3 millimeters of variation across two meters. Fill cracks and sand raised areas smooth. Let the panels rest indoors for at least 48 hours. Keep them flat, dry, and away from direct sunlight.
Tips: Use a moisture meter when installing over masonry or a recently repaired wall. Excess moisture can cause swelling, open joints, or veneer lifting. Mark every repair before covering it. I once ignored a small damp patch, and the panel edge later needed replacement. That mistake was avoidable.
Plan the layout before applying adhesive or fasteners. Measure the wall, doors, outlets, and corners twice. Mark a clear centerline, then arrange panels around it. This usually creates a more balanced appearance than starting at one end. Dry-fit the panels on the floor and label their positions. Keep grain direction consistent, especially near eye-level features. Check the first panel with a level, because later panels will follow its error. Leave the required movement gap at edges, ceilings, and floors according to the panel instructions. A narrow offcut may look convenient, but it can make the entire wall feel uneven.
Accurate measuring controls the entire installation. Measure each wall section at the top, middle, and bottom. Walls rarely remain perfectly square. Record the smallest width, not the most convenient one. The USDA Forest Products Laboratory’s Wood Handbook reports tangential wood shrinkage of roughly 6% to 12%. Radial shrinkage is commonly about 2% to 6%. Veneer panels can still respond to changing humidity. Leave the manufacturer’s specified expansion gap around floors, ceilings, and corners.
Use a fine-tooth blade and support the panel fully before cutting. Mark the finished face with low-tack tape, then cut from the appropriate side to reduce visible tear-out. For outlets, transfer measurements from two fixed reference points. Do not measure from the nearest edge alone. That shortcut has caused expensive mistakes in my own installations. Measure twice. Cut once.
Test-fit every panel before applying adhesive or mechanical fasteners. Place it against the wall and check seams, corners, outlet openings, and grain direction. A 2023 report from the U.S. Energy Information Administration notes that residential space-conditioning remains a major source of indoor environmental change. Seasonal humidity shifts can expose tight joints or poor alignment. Keep panels flat and allow them to acclimate indoors according to the panel supplier’s technical guidance. Dry-fitting may feel slow, but it reveals problems while correction remains possible. One panel may look perfect alone, yet appear noticeably darker beside another. Rotate or reposition it before fixing. Expect some variation; natural veneer is not a printed surface.
Securing wood veneer panels begins with careful wall preparation. The surface must be dry, clean, and structurally sound. Remove dust, loose paint, and grease before measuring anything. A long level helps reveal shallow dips that may remain invisible at first glance. Fill minor gaps and allow the repair compound to cure fully.
Let the panels rest indoors for several days. This reduces movement after installation. Mark a level starting line, then check it against the floor and ceiling. Floors are rarely perfectly straight. I learned this the hard way on an early project, when a small angle error grew across the entire wall. Measure twice, but still inspect the layout from several steps away.
Apply a compatible construction adhesive in vertical beads, leaving space near the panel edges. Press each panel firmly against the wall, then hold it with temporary bracing or finishing nails where permitted. Use hidden fasteners or screws with suitable anchors when the wall surface is uneven or the panels are heavy. Keep fasteners away from electrical cables and plumbing, and never drill without checking their likely locations.
Leave the expansion gap recommended for the panel material. Cover it later with trim. Stagger joints when the design allows, and use a level after every panel. Adhesive can grab quickly. A panel that looks straight at first may shift before it sets, so recheck it after a few minutes.
Clean edges make wood veneer wall paneling look intentional rather than simply installed. I measure every corner twice before cutting trim. Small errors become obvious near door frames and ceiling lines. Use fine-grit sandpaper to soften exposed veneer edges without removing the thin wood layer. Apply matching edge treatment sparingly, and test it on an offcut first. Keep it subtle.
At outside corners, align the grain before securing the panels. A narrow, even gap can accommodate normal movement and looks cleaner than forced joints. Fill unsuitable gaps with a compatible wood filler, then sand lightly after curing. Around outlets, switch plates should sit flat without pressing against the veneer. Allow adhesives and finishes to cure fully before cleaning the surface.
Maintenance starts with gentle habits. Dust the paneling using a soft, dry cloth or a suitable vacuum brush. Wipe spills quickly with a barely damp cloth, then dry the area immediately. Avoid soaking joints, abrasive pads, and strong household cleaners. Keep indoor humidity reasonably stable to reduce shrinking and swelling. Inspect corners every few months for lifting, dark seams, or loose trim. I once overlooked a small edge gap, and seasonal movement made it worse. That mistake taught me to repair minor damage early, even when the paneling still looks acceptable. Do not rush.
Check moisture conditions before color. Choose a stable core for humid areas, and inspect sheets for bowing, loose veneer, or open joints.
Keep panels flat and dry for 48–72 hours when the instructions permit. Avoid direct sunlight. That step is easy to skip, but important.
The wall should be clean, dry, sound, and reasonably flat. A practical target is no more than 3 millimeters of variation across two meters.
Prepare a moisture meter, long level, fine-tooth saw, compatible adhesive, spacers, and corrosion-resistant finishing nails. Use suitable anchors for heavy panels.
Measure the wall, doors, outlets, and corners twice. Mark a centerline, dry-fit panels, and label each position before applying adhesive.
Later panels follow its alignment. Check it with a level, then inspect the layout from several steps away. A small angle error can spread across the wall.
Control indoor humidity, especially in masonry areas or recently repaired walls. Leave movement gaps at floors, ceilings, corners, and other edges.
Apply compatible adhesive in vertical beads, keeping space near panel edges. Add temporary bracing or permitted finishing nails while the adhesive sets.
No. Check likely cable and plumbing locations first. Use suitable anchors, and avoid drilling where hidden services may run.
Choosing appearance before wall conditions is one. Ignoring a damp patch or skipping repeated level checks can cause swelling, lifting, or uneven joints.
Installing wood veneer wall paneling in 2026 requires careful planning, accurate preparation, and attention to finishing details. Begin by selecting suitable wood veneer panels and gathering essential materials such as adhesive, fasteners, measuring tools, a level, and cutting equipment. Prepare the wall by cleaning, repairing, and ensuring it is smooth, dry, and structurally sound. Before installation, plan the layout to create balanced seams and account for corners, outlets, windows, and doors.
Measure each section precisely, cut the panels carefully, and test-fit them before applying adhesive or fasteners. Secure the panels evenly, maintaining consistent alignment and spacing throughout the project. After all panels are installed, finish exposed edges with suitable trim or edge treatments for a polished appearance. Regular maintenance, including gentle dusting and prompt attention to moisture or damage, will help preserve the beauty and durability of Wood Veneer Paneling Walls for years to come.

Xiuchen